Query Language Keys
On this page:
- What Are QL Keys?
- Accessing QL Keys
- Creating a New QL Key
- Testing QL Keys
- Editing QL Keys
- Deleting QL Keys
What Are QL Keys?
QL Keys is a tool/function made available to support Integrators in instances where they require reports or queries that are too complex to be easily described in natural language.
QL Keys allow Integrators to bind a custom QL (a Query Language statement that has been designed and written for their database and specific use case) to a uniquely generated hash-string. This Key can then be entered into a Dashboard or Data Messenger in place of a natural language query.
Once generated, a QL Key can be given a name, description, and if desired, assigned to a specific Project.
Accessing QL Keys
In The Portal
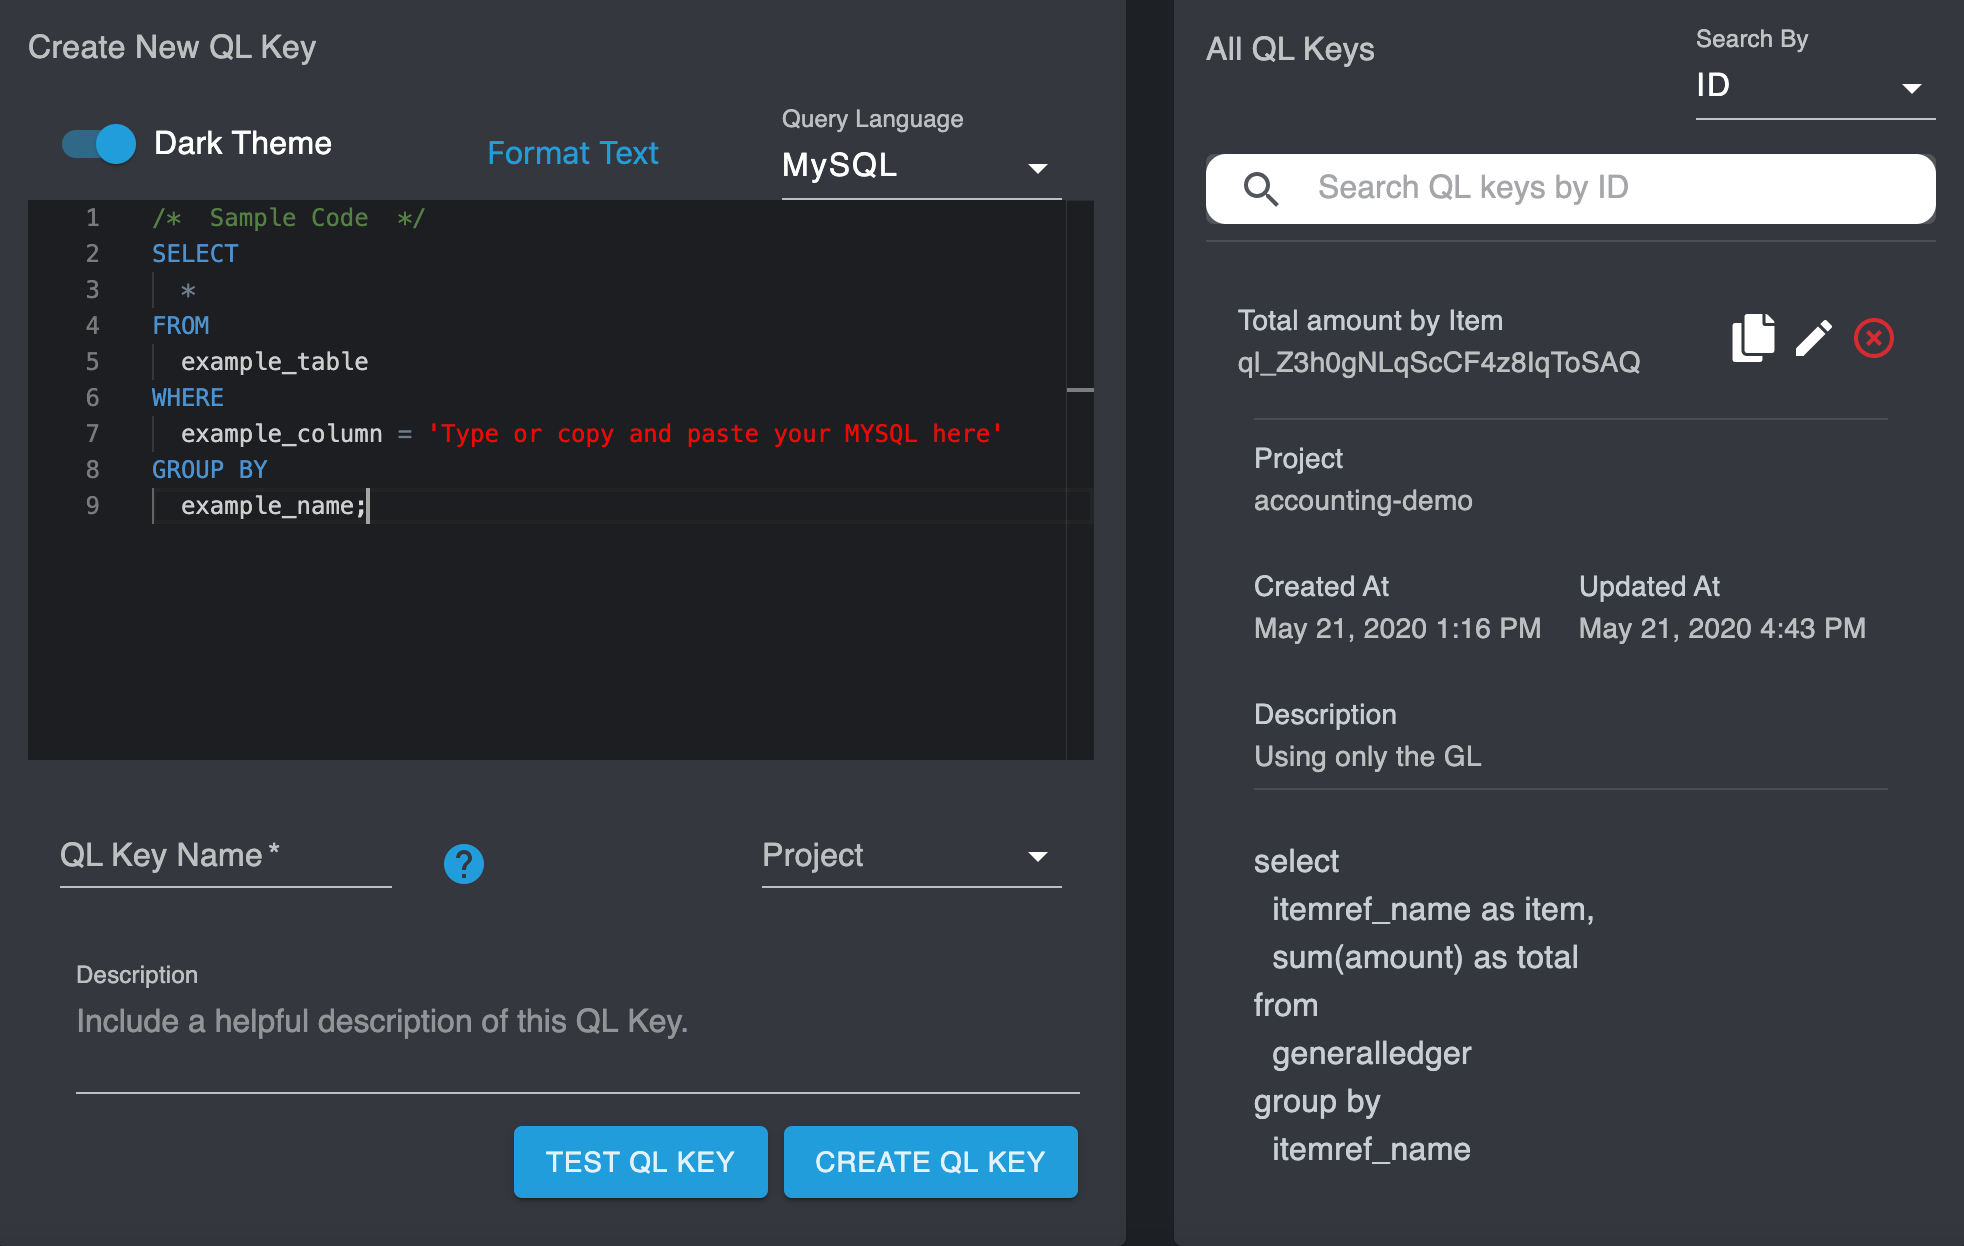
Navigate to QL Keys in the Integrator Portal to create new QL Keys and to manage (edit or remove) QL Keys that have been set up.
On the right hand side, a list of all QL Keys can be viewed. Click on any QL Key to expand the view and see details pertaining to that Key, including the Project it is assigned to, when it was created, and when it was last updated. To collapse the detailed QL Key view, simply click on the QL Key again.
At the top of the "All QL Keys" list, you can search for a specific Key using the dropdown filters (filter by ID, Name, or SQL) and the search bar.

Left: A text editor and simple form for QL Key creation.
Right: An expanded QL Key selected from the list of generated QL Keys.
With The API
To view a list of QL Keys using the API:
To get the details of a specific Key, using the API:
Creating a New QL Key
In The Portal
To create a new QL Key, navigate to QL Keys in the Portal and select the query language you wish to use from the dropdown in the top right corner of the "Create New QL Key" section.
Next, type out or copy and paste your statement in the Text Editor.
Then, fill in the following details:
- QL Key Name - This is the name that will be displayed for your new QL Key. This field is required.
- Project - Restrict this QL Key to a specific Project if desired.
- Description - Provide helpful context about when (or how) to use this Key. This field is optional.
Click CREATE QL KEY to finish setting up your new Key.
With The API
To create a QL Key using the API:
Testing QL Keys
QL Keys will only execute SELECT statementsAll write permissions are blocked through the API.
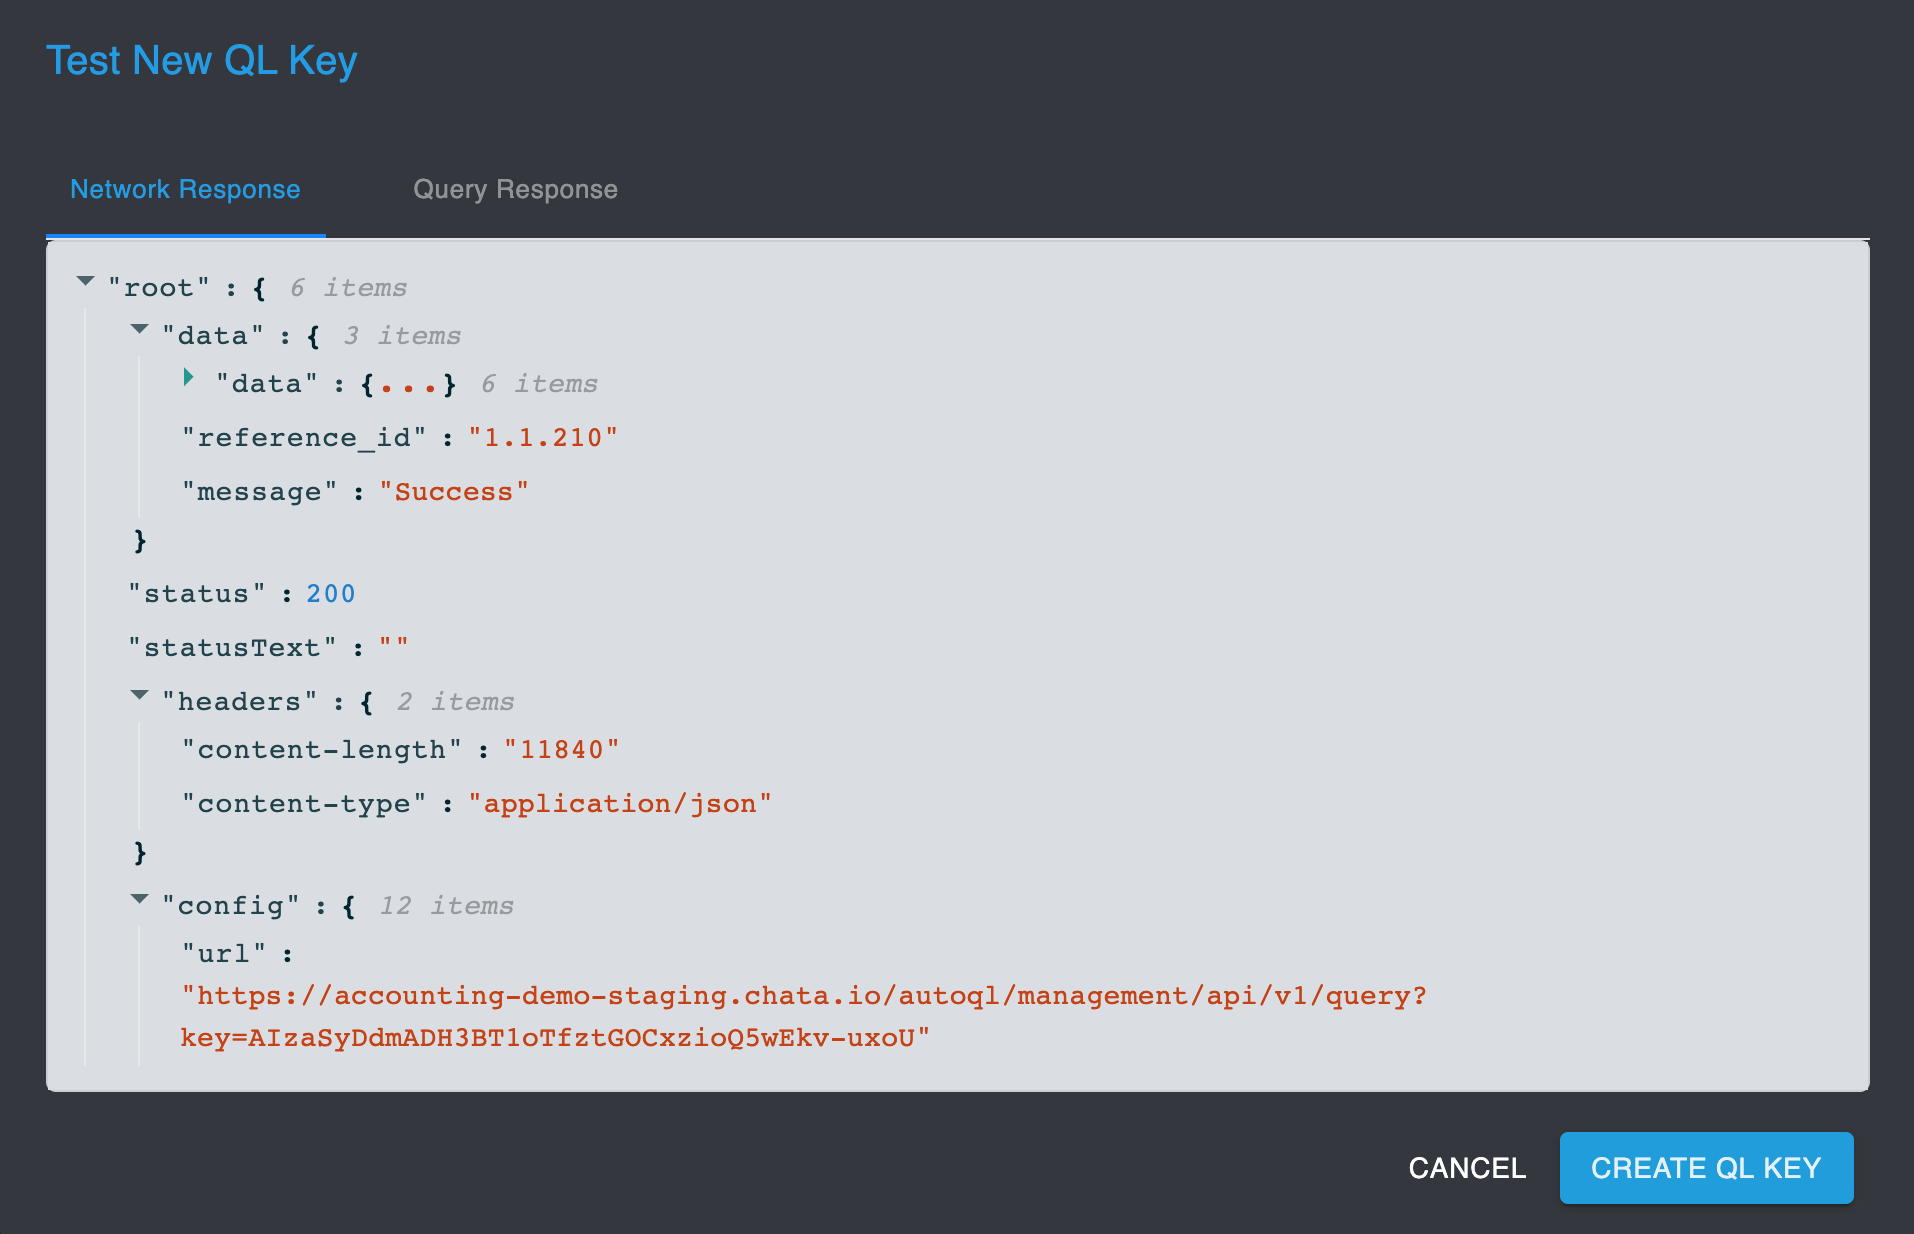
Once you have finished entering all of the relevant details, you can test the output of your query by clicking the TEST QL KEY button. Testing your QL Key enables you to view the generated Network and Query response.

Once you finish testing your Key and reviewing the Network and/or Query Response, click CREATE QL KEY to finish setting up your new Key.
With The API
To test a QL Key using the API:
- Use POST /autoql/management/api/v1/query
Be sure to double check your codeIf your code does not compile, you will not be able to create your new QL Key. The "Test Query" endpoint will validate your query without actively executing your code.
Editing QL Keys
In The Portal
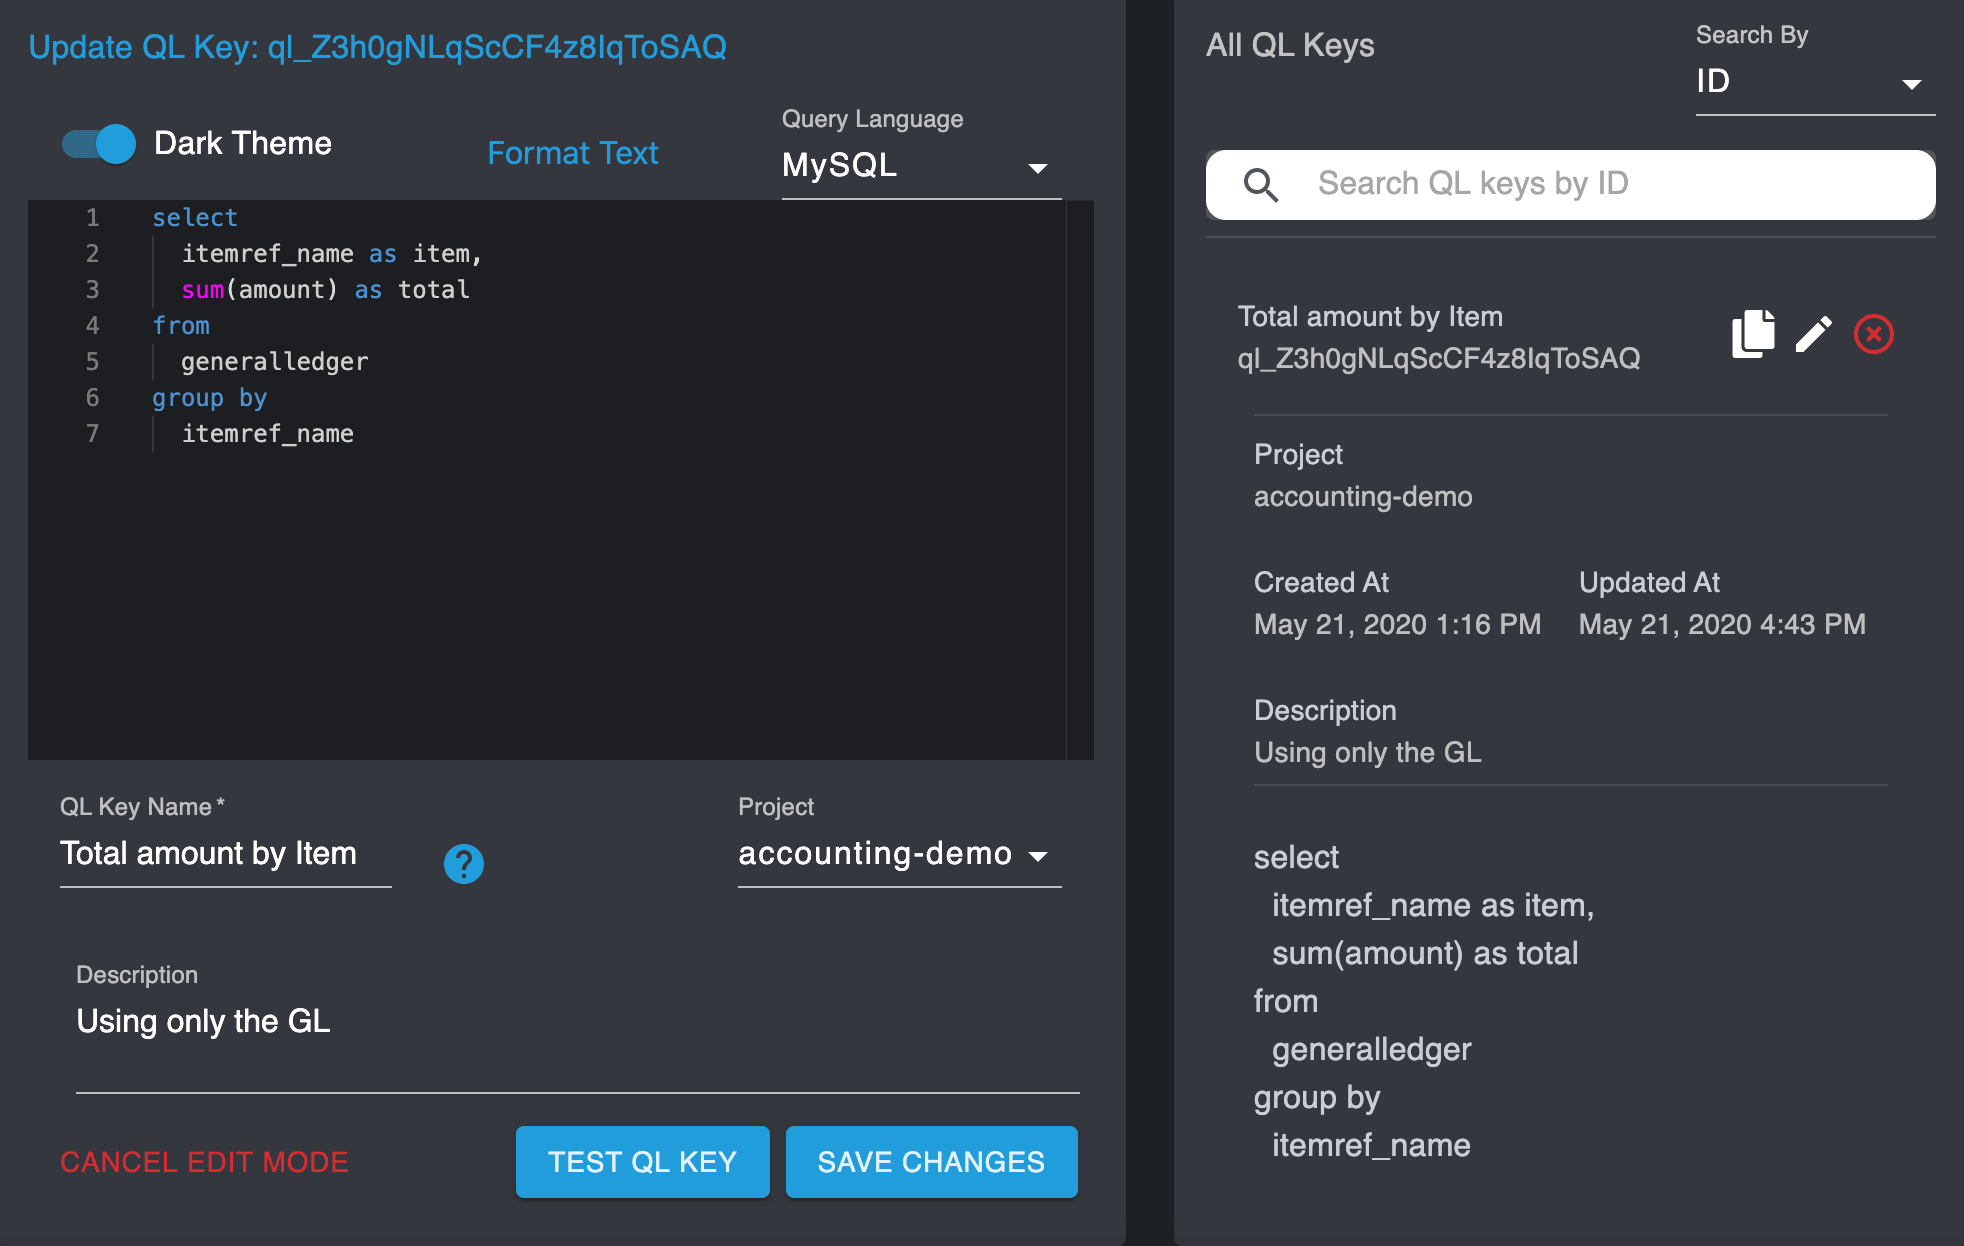
To make changes to an existing QL Key, begin by clicking the "Edit QL Key" icon beside the Key with you wish to update.
On the left side, you will see "Update QL Key:" accompanied by the Key ID that corresponds to the Key you have opted to edit. The Text Editor and the fields below will also populate with the information pertaining to that Key.

Make any changes required and then click SAVE CHANGES to update your QL Key.
Click CANCEL EDIT MODE to undo any changes and revert the interface back to its default state.
With The API
To edit a QL Key using the API:
Deleting QL Keys
In The Portal
Click the "Remove QL Key" icon (X) beside the QL Key you wish to delete.
You will be prompted to confirm your intent to remove the QL Key. Once a Key has been deleted, you cannot undo this action.
With The API
To delete/remove a QL Key using the API:
- Use DELETE /autoql/management/api/v1/query/ql-keys/{id}
Deleting a QL Key is a permanent actionOnce a QL Key has been removed, this action cannot be reversed.
If the Key is in use on a Dashboard tile, the tile will no longer render data.
Updated 5 months ago
