Webhooks
On This Page
- Overview of Webhooks
- Accessing Webhook Secret Keys
- Creating and Maintaining Webhooks
- Viewing Webhook Logs
Overview of Webhooks
AutoQL doesn't store data from your database to dispense on demand. Instead, we deliver the data back to your system using webhooks. These webhooks allow our Data Alerts feature to balance providing your users with access to their data asynchronously which enables you to manage your proprietary data on your own terms.
A Webhook is comprised of two parts:
Webhook Secret - A secret key used to ensure the webhook is coming from AutoQL
URL Address - An endpoint URL exposed in your own service
AutoQL offers two separate secret keys for development (Sandbox) and live (Production) environments. Providing two keys allows you to test your callbacks securely before making them accessible to your users.
Required for Data AlertsTo make full use of our Data Alerts system, you must set up webhooks. Without these set up, users will receive a notification that an alert is triggered, but will not be accompanied by data.
Accessing Webhook Secret Keys
In the Portal
Setting up, deleting and re-provisioning Webhook Secrets, as well as monitoring webhook traffic, can all be performed through the AutoQL Integrator Portal within the Webhooks section.
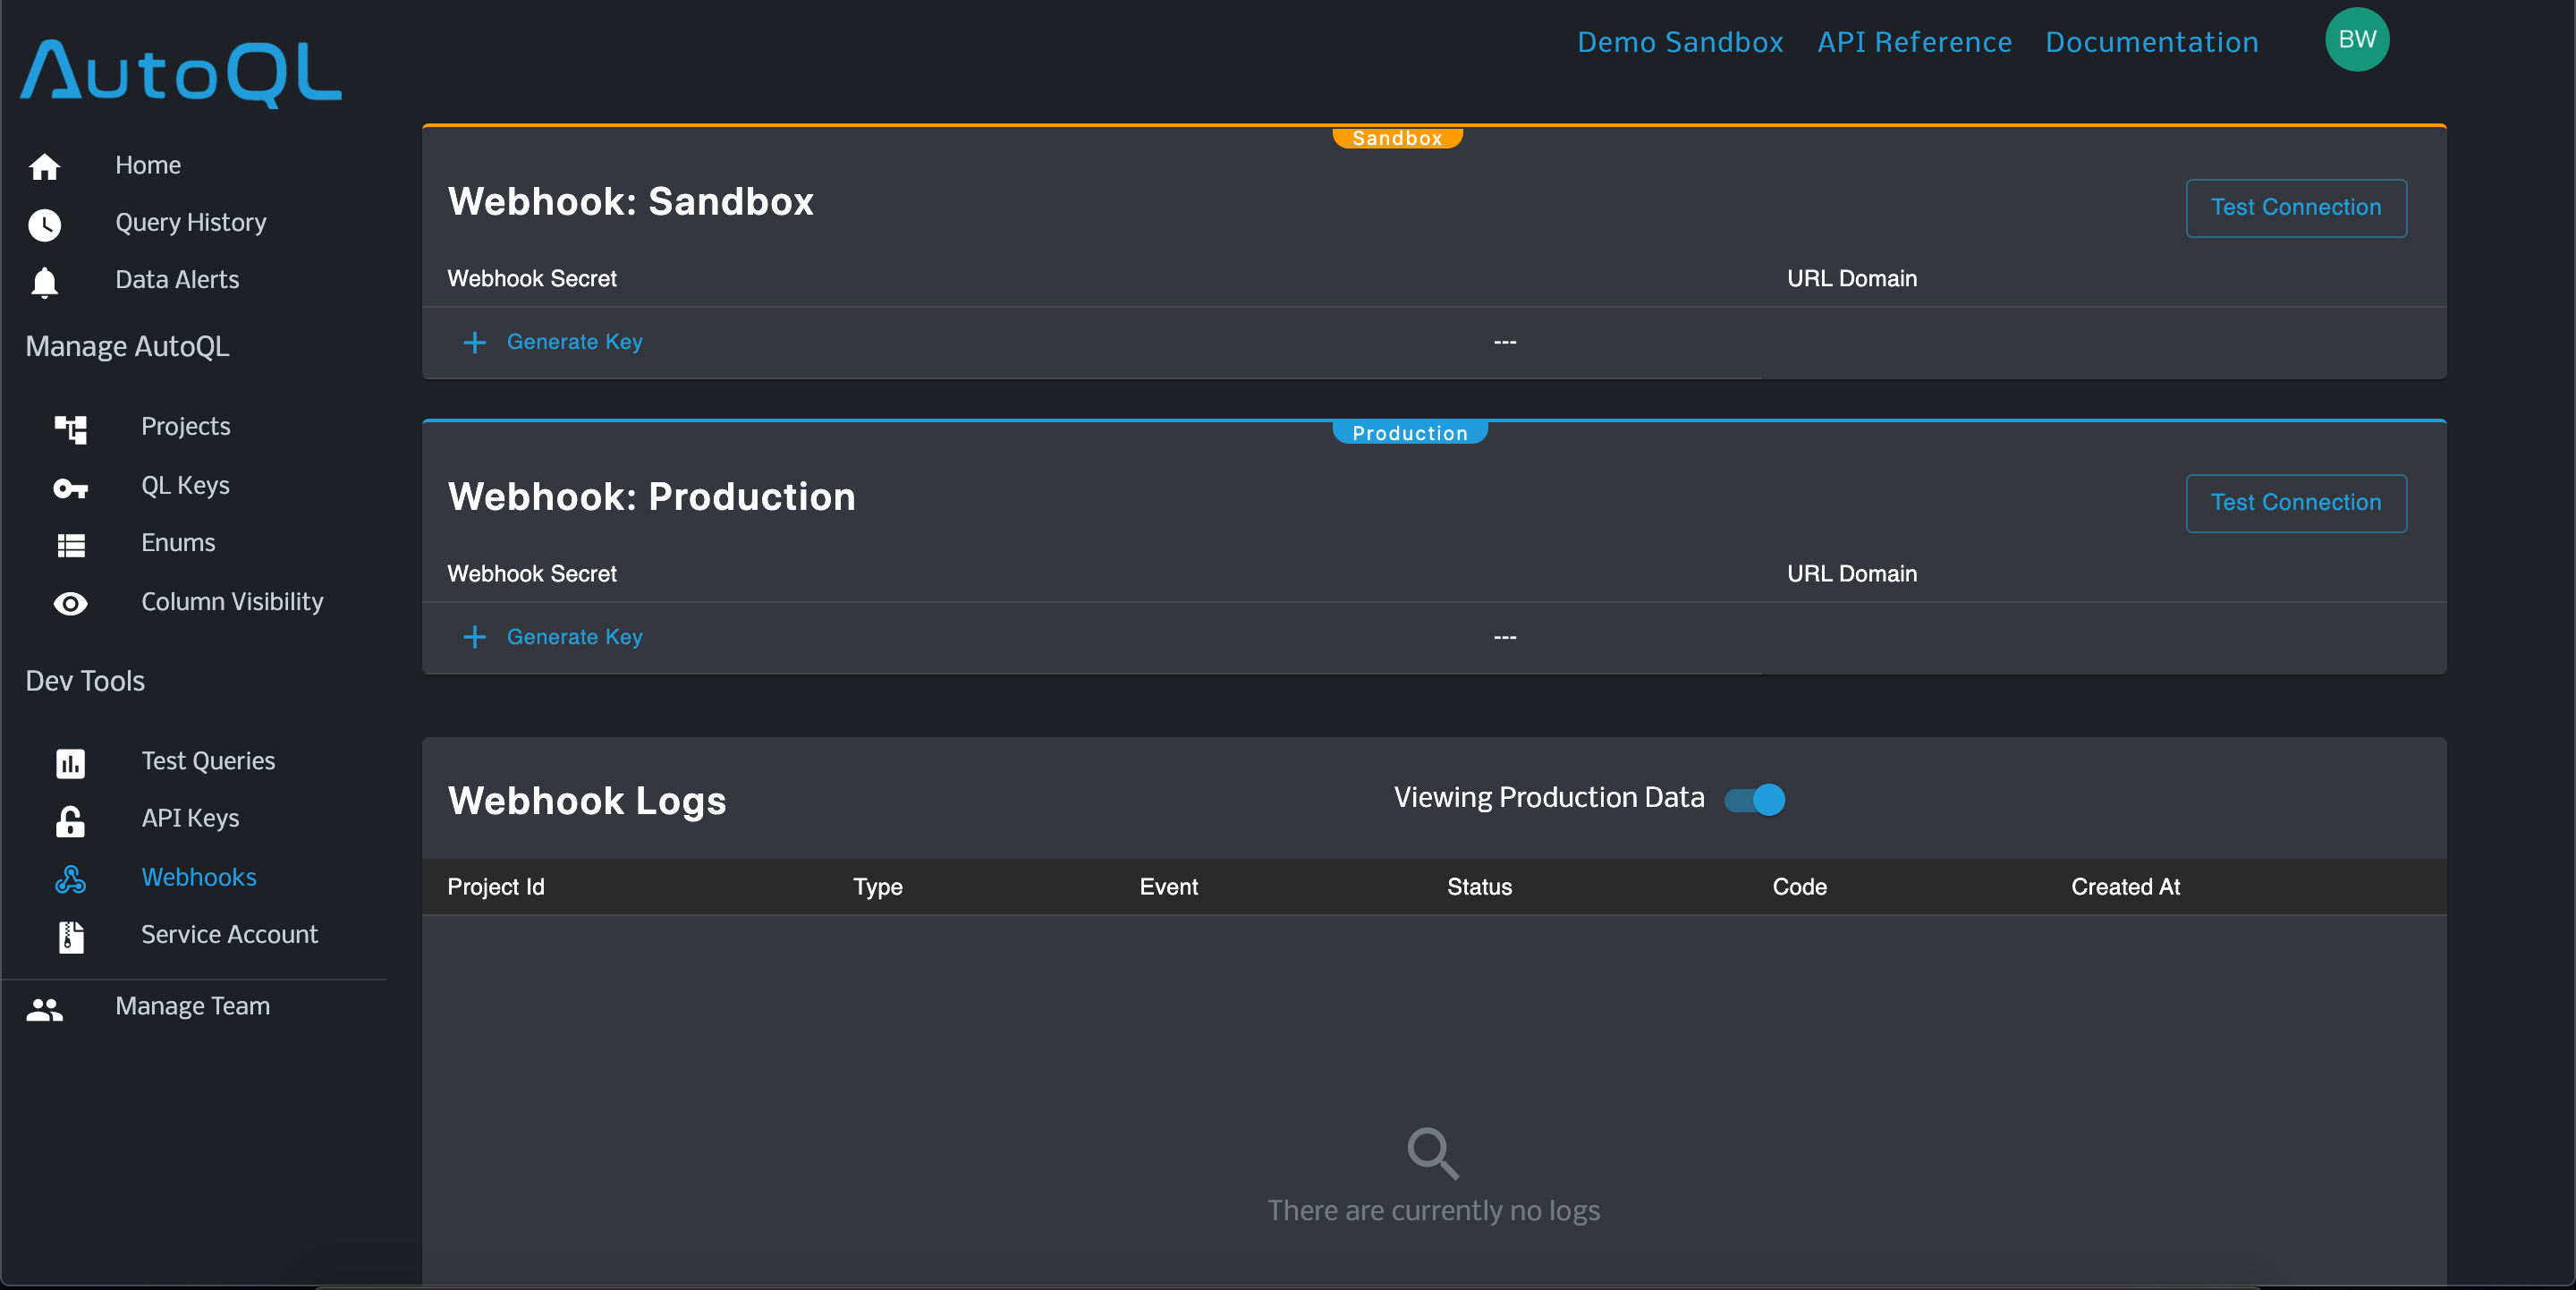
To manage your webhooks through the Integrator Portal, navigate to AutoQL Setup and select the Webhooks tab from the navigation menu. Here, you'll find two separate display cards for your secret key and desired URL for each environment (Sandbox and Production), as well as a table for monitoring log reports

The state of your webhooks UI upon first arrival
Using APIs
domain - Your Integrator domain
apiKey - Your AutoQL API Key
token - Your implemented authorization token
environment - Accepts a string of either 'sandbox' or 'production'
GET /autoql/management/api/v1/notifications/webhooks}
axios.get(
  `${domain}/autoql/management/api/v1/notifications/webhooks?key=${apiKey}`,
  {
     headers: { Authorization: `Bearer ${token}` },
  });
Creating and maintaining Webhooks
In the Portal
Generating Webhook Secret -
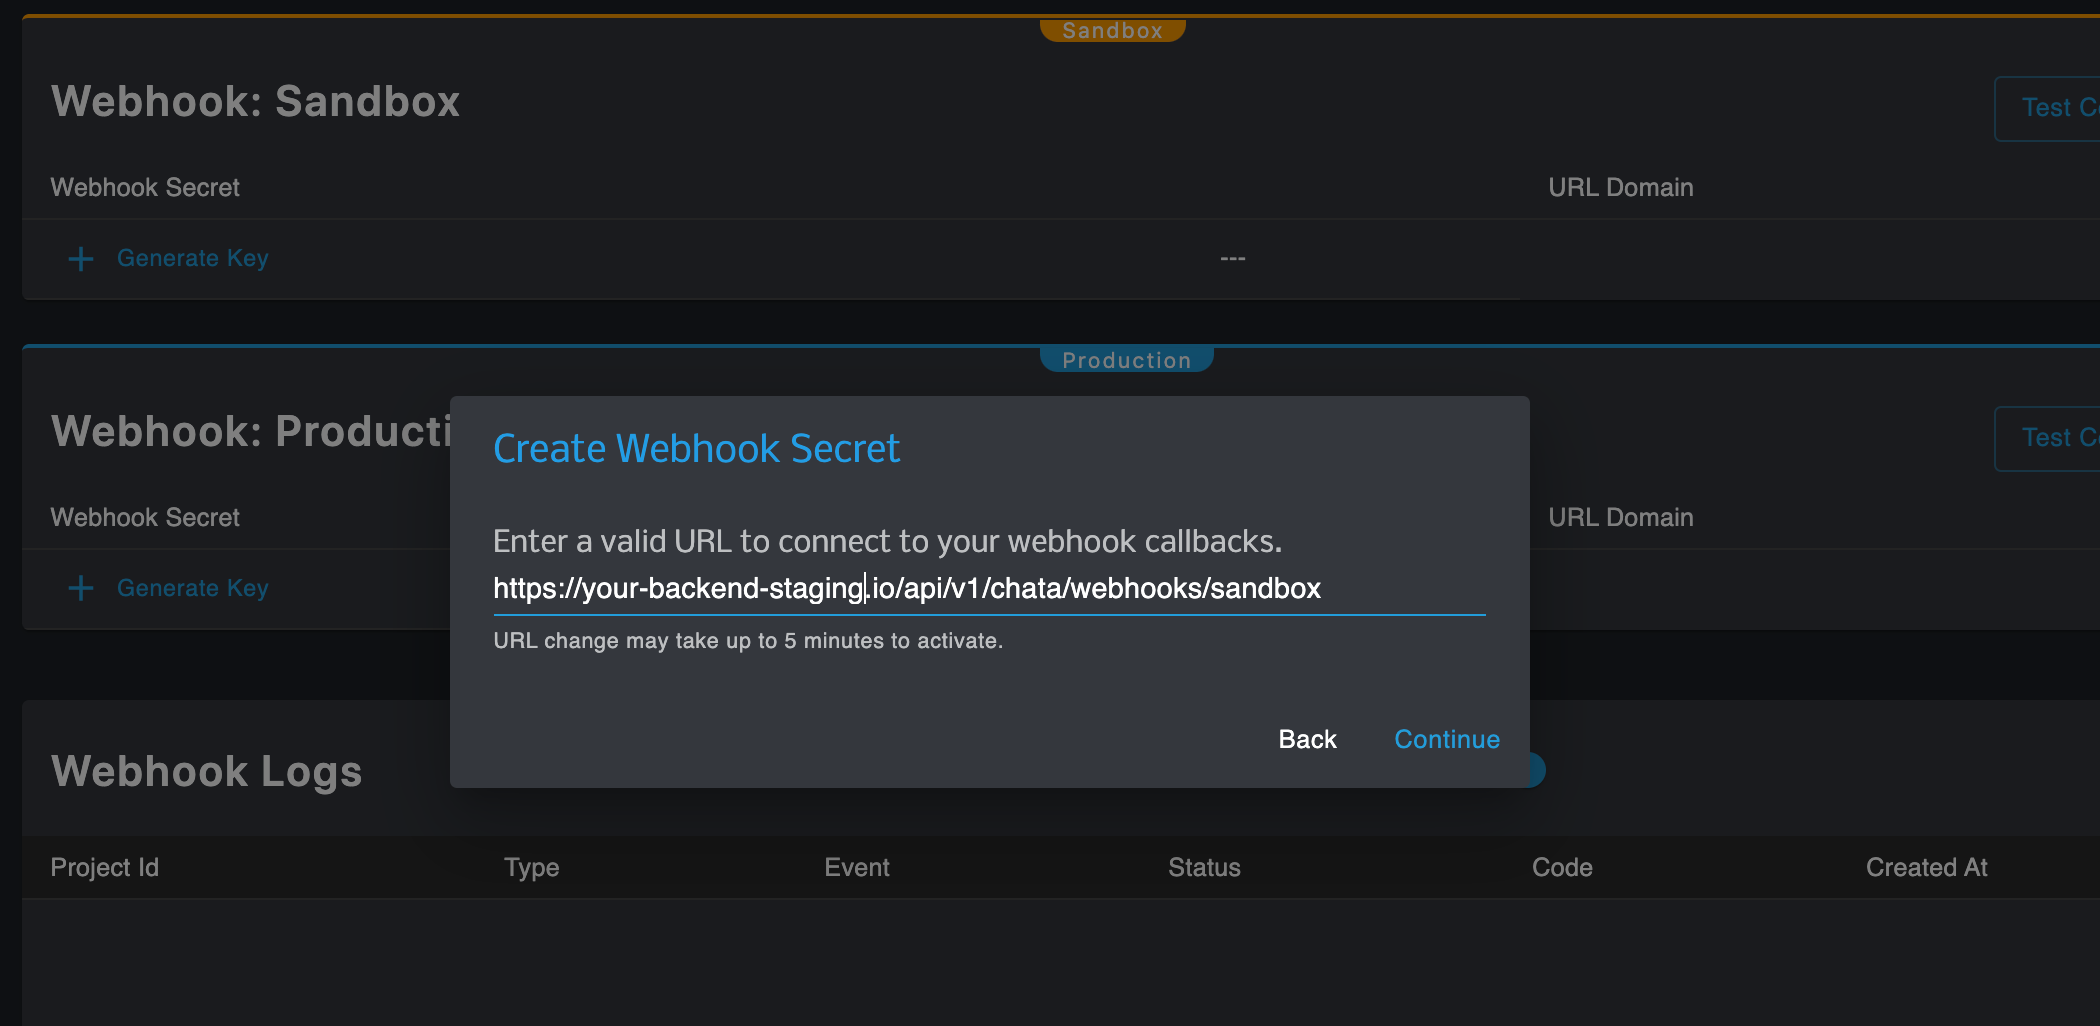
Setting up your first webhook is made remarkably simple through the portal. Simply click the Generate Key button for either environment to prompt a modal where you will enter the URL domain you have assigned to allow access to your data source. After pressing continue, a secret key will be generated and assigned to that URL.

The modal prompted by the Generate Key button.
AuthenticationYou will need to validate this url and key in your backend, before making successful callbacks.
Testing Webhook Connection -
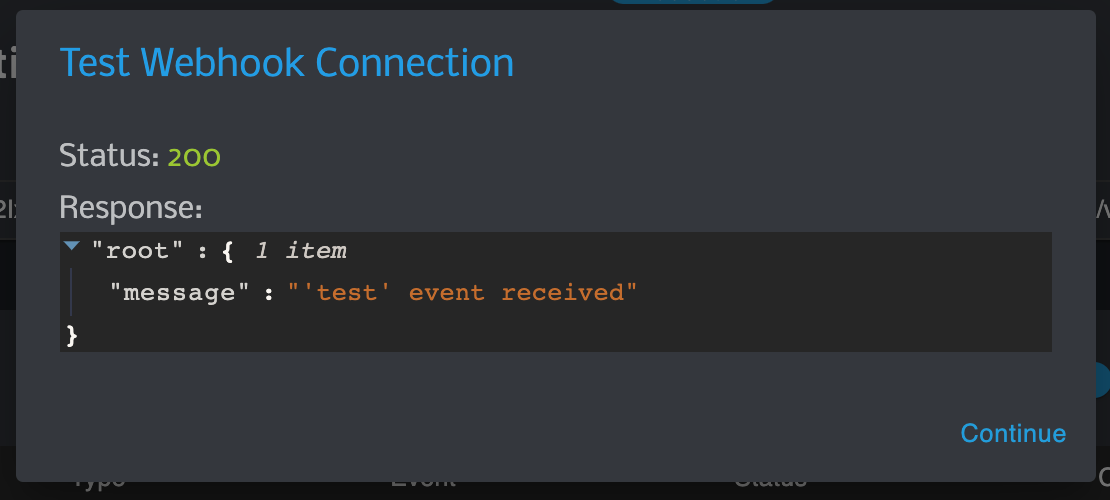
The Test Connection button prompts a modal that displays the status code and JSON response that validate whether your webhooks are established successfully

Test Connection modal
Using APIs
domain - Your Integrator domain
apiKey - Your AutoQL API Key
token - Your implemented authorization token
environment - Accepts a string of either 'sandbox' or 'production'
url - Your URL endpoint
NoteThe API Key you provide should match the environment string
ie: if environment is 'sandbox', the API Key provided should be your Sandbox Key.
-- See API Keys for more information on environments
Create or update
PUT /autoql/management/api/v1/notifications/webhooks/{environment}
example code:
axios.put(
  `${domain}/autoql/management/api/v1/notifications/webhooks/${environment}?key=${apiKey}`,
  { url: url },
  {
    headers: { Authorization: `Bearer ${token}` },
  }
);
Regenerate Webhook Secret
PUT autoql/management/api/v1/notifications/webhooks/{environment}/secret
example code:
axios.put(
   `${domain}/autoql/management/api/v1/notifications/webhooks/${environment}/secret?key=${apiKey}`,
  {},
  {
    headers: { Authorization: `Bearer ${token}` },
  }
);
Delete
DELETE /autoql/management/api/v1/notifications/webhooks/{environment}
example code:
axios.delete(
   `${domain}/autoql/management/api/v1/notifications/webhooks/${env}?key=${apiKey}`,
  {
    headers: { Authorization: `Bearer ${token}` },
  }
);
Test connection
POST /autoql/management/api/v1/notifications/webhooks/{environment}/test
example code:
axios.post(
     `${domain}/autoql/management/api/v1/notifications/webhooks/${environment}/test?key=${apiKey}`,
  {},
  {
    headers: { Authorization: `Bearer ${token}` },
  }
);
Viewing Webhook Logs
In the Portal
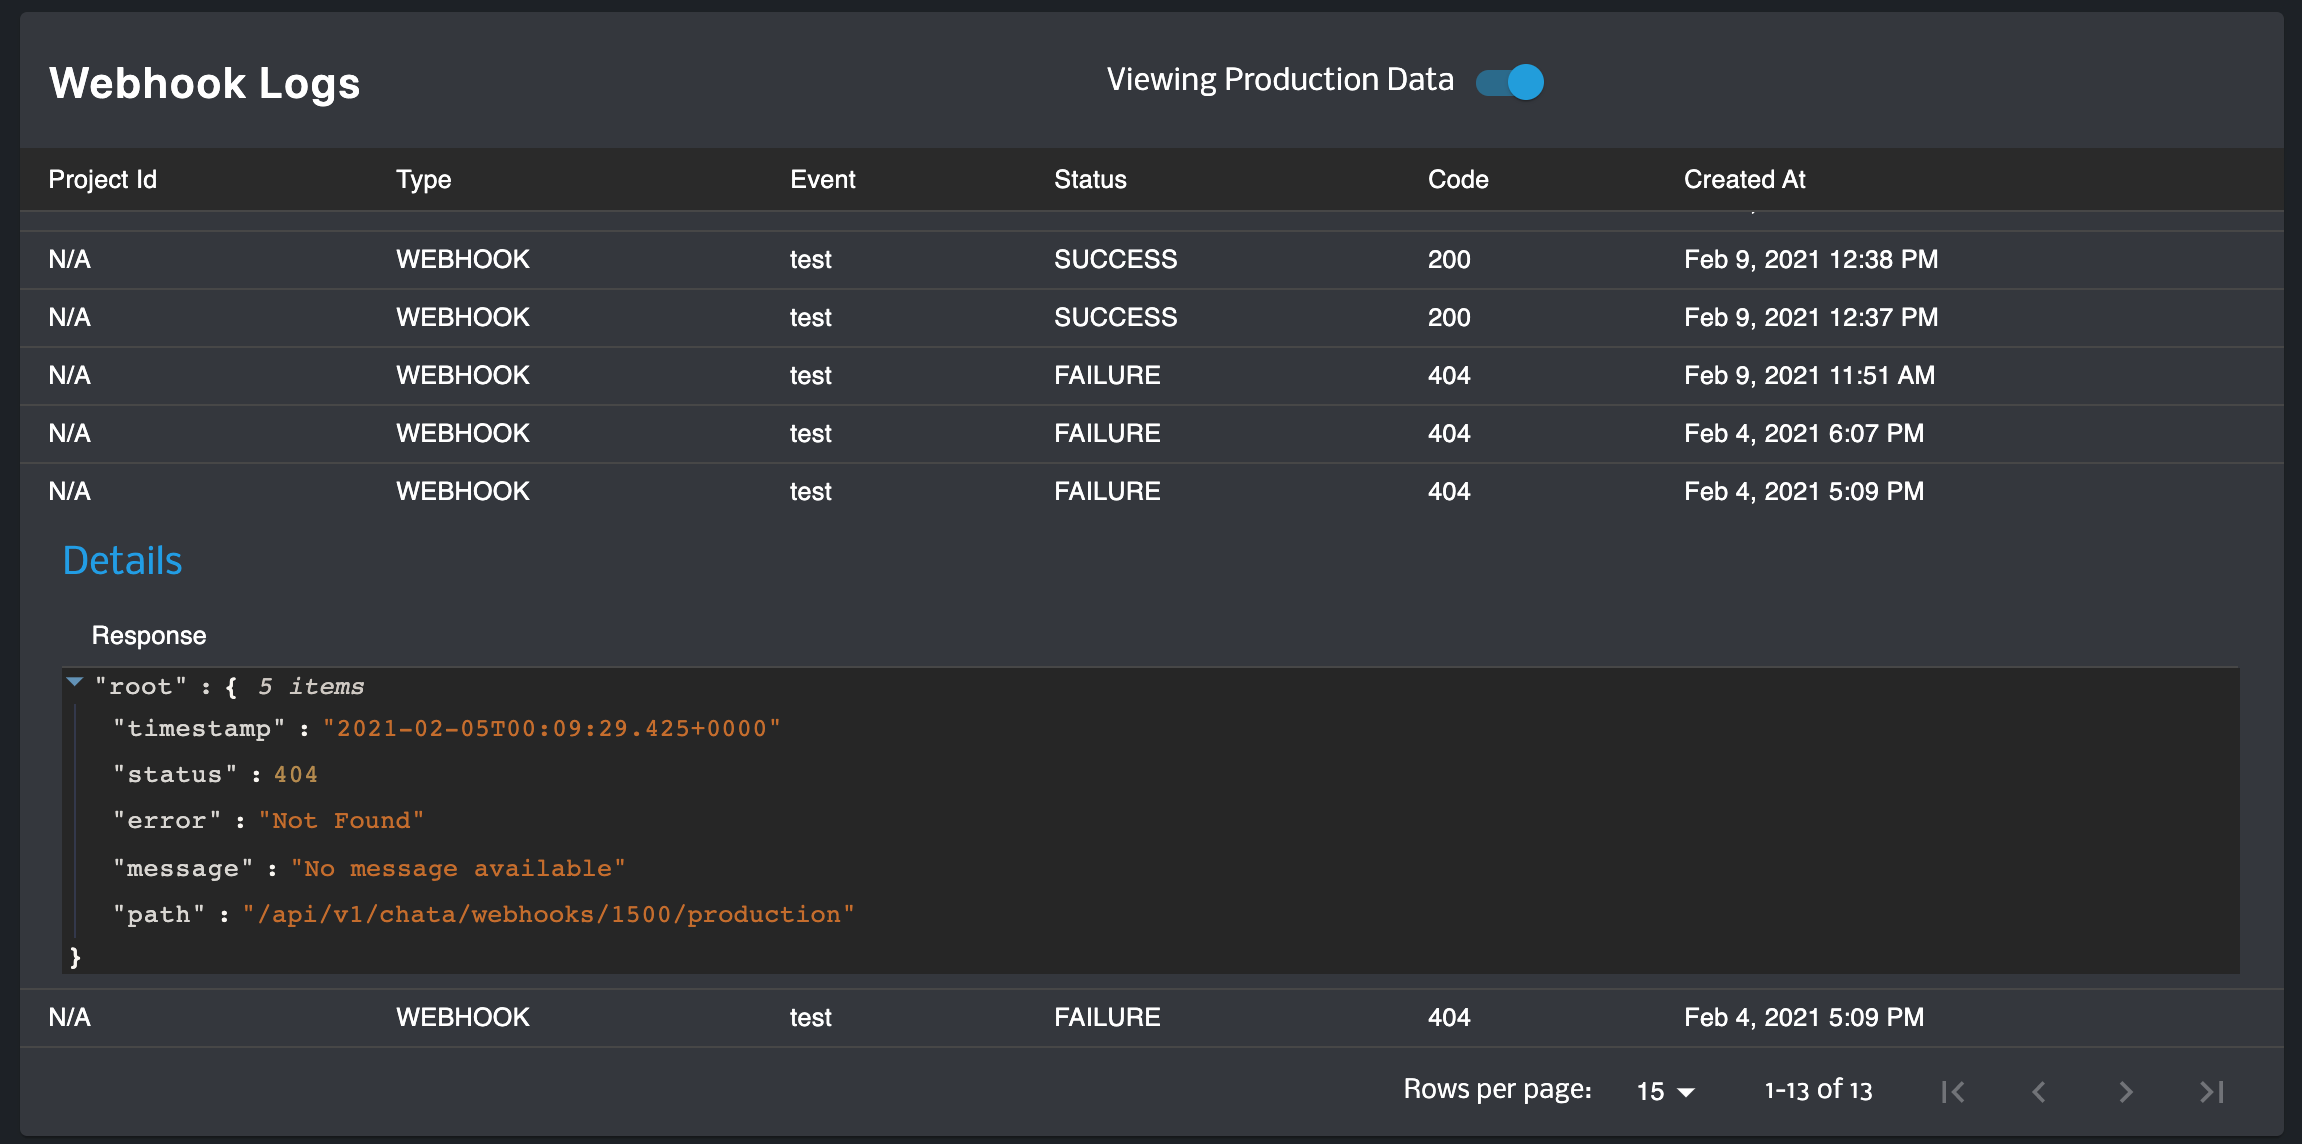
The Webhook Logs helps you monitor your webhook traffic and troubleshoot errors should they arise. Each row can be expanded to show the logged JSON response.
Project ID - The id of the Project that triggered the webhook (N/A if log is not Project dependant such as a test)
Type - The type of notification
Event - What type of event (ie: test, data_alert.true)
Status - Whether or not the event was successful
Code - The status code of the response. this is useful for troubleshooting errors.
Created At - The date and time the event was triggered.
Environment Toggle - This toggle (which sits above the Webhook Logs table) allows you to switch your view between Production and Sandbox Environments. See Managing Projects for more details on Project environments.

Using APIs
domain - Your Integrator domain
apiKey - Your AutoQL API Key
token - Your implemented authorization token
environment - Accepts a string of either 'sandbox' or 'production'
offset - Accepts an integer value representing the paginated offset value (page)
limit - Accepts an integer value representing the number of rows returned per page
GET /autoql/management/api/v1/notifications/webhooks/{environment}/logs
example code:
axios.get(
  `${domain}/autoql/management/api/v1/notifications/webhooks/${environment}/logs?key=${apiKey}&offset=${offset}&limit=${limit}`,
  {
     headers: { Authorization: `Bearer ${token}` },
  }););
Updated 5 months ago
